Headlight covers are protective lenses shielding our car’s headlight from dirts, road grits, sun rays, and other harsh debris. However, due to the polycarbonate nature of these headlight covers, they are susceptible to pollution, UV rays, and moisture which can lead to oxidation of the headlight lenses, discoloration, and fogginess. Not only are foggy headlights unappealing, but they are also risky. In the dark, yellowing headlights produce less light, obstructing your view and putting you and everyone else in your car in danger. Fortunately, cleaning up cloudy headlights is not too difficult. You won’t have to spend a lot of money at the mechanic because headlight restoration is something you can do yourself.
Here is our comprehensive guide to fixing headlights permanently, as well as a few expedient emergency fixes you might try if you’re pressed for time.
Why Do Headlights Get Foggy
All car’s parts, including the headlights, are frequently glowing when you first get it. A few months later, the once-shiny headlights are changed with foggy headlights because of;
- Oxidation: Most today’s automobiles have headlights made of polycarbonate plastic. Contrary to glass, polycarbonate material develops tiny fissures that, when exposed to sunlight, turn yellow, resulting in headlights that are hazy or foggy.
- Time and Weather Conditions: Although headlights made of polycarbonate plastic are typically coated, extended exposure to severe weather can cause the coating to flake off.
- Water Vapor: Another typical cause of hazy headlights is condensation that has become trapped in the light box of your car.
- Dirt and Chemicals: If you’re constantly driving, the headlights of your automobile may accumulate a thin layer of dirt and chemicals, turning them yellow.
How to Restore Automobile Headlights

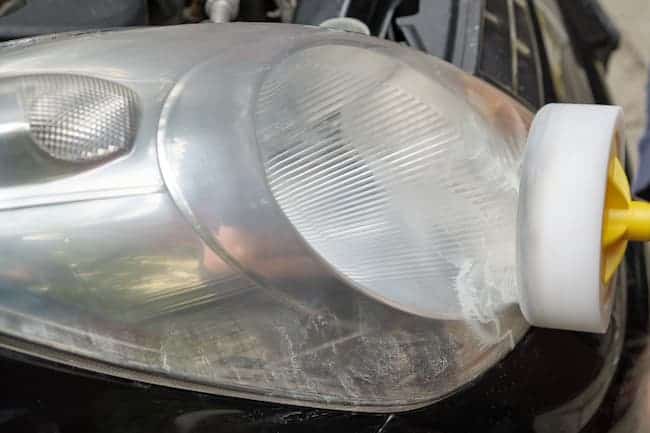
One of the fastest and most efficient ways to restore car headlights is to apply a headlight restoration wipe or kit. However, if you would like to do it the old fashioned way, you can sand your headlight covers with different sanding grits thus, exposing the once-shiny light lenses you once adored. You will require the following:
- Plain water
- Warm, soapy water
- Soft, dry cloth
- Sandpaper sheets (600, 1000 and 2000 grit)
- Masking/painter’s tape
- Flannel polishing cloth
- Plastic Polishing Compound
- UV resistant sealant
- Clean your Headlights
When headlights are sanded without being thoroughly cleaned, particles are ground into the surface, creating a harsh, abrasive surface that has poor adhesion. Headlight lens surfaces should be cleaned with warm, soapy water, rinsed, and dried with a soft, dry towel. You could decide to wash the surrounding surroundings as well to aid with the following step.
- Tape Off the Area
Avoid accidentally sanding off your car’s paint, since this will only result in further time- and money-consuming automotive issues. Before you begin sanding your headlights, tape off the surrounding area using painter’s or masking tape. Two pieces of tape are typically sufficient. If you still feel anxious after using tape, you can always unscrew your headlights, although this will take some effort.
- Sanding Your Headlights
The actual work can start once the cloudy headlights have been cleaned and the area has been taped off. You’ll require some laborious work and multiple grades of sandpaper to complete the procedure. The grit gets finer the finer the sandpaper. Work your way up to the finest grit starting with the coarsest. The sanding guidelines for this do-it-yourself headlight restoration procedure are as follows:
- Using dry sand and 600-grit sandpaper: With the 600-grit sandpaper, sand the headlights until the surface is completely covered. Make sure to keep the pattern consistent until the fog layer has been removed. If your headlights are severely corroded and hazy, use 400-grit sandpaper.
- Using wet sand and 1000-grit sandpaper: Using your water spray bottle, lightly wet sand your headlights’ surface with 1000 grit wet or wet-dry sandpaper after applying water (as a lubricant). Use consistent sanding strokes to speed up the headlight restoration process. Water should keep lubricating the surface.
- Wet sand with 2000-grit sandpaper: Now that your headlights should be more visible, give them one last round of sanding to give them that extra boost and polish the surface of the lens. Water the surface to lubricate it, then use 2,000 grit wet-dry sandpaper in the same manner as in the previous step to smooth out the surface with even strokes.
- Clean and Polish
The fog coating should have been removed, making your headlights brighter and almost brand new again. To make them sparkle again, you’ll need to clean and polish them. Apply your polishing solution with a cotton polishing cloth in even strokes after wiping away the sanding residue with alcohol and paper towels.
If you want to use any power equipment, you can also rub and polish your headlights with a cotton buffing wheel, a felt polishing wheel, a die grinder, or an angle grinder. Instead of using a polishing solution with these buffing wheels, one would use a blue rouge buffing solution bar. Just be sure it’s turned down low to prevent overheating the plastic surface from harming the headlight.
- Apply UV Sealant
Although sanding your headlights will restore them quickly and easily, you shouldn’t do it frequently. Use a UV sealant to complete this project if you want to permanently get rid of the foggy appearance. The oxidation of headlights is avoided by using a UV sealant. Apply at least three coats to maintain the fantastic headlamp shine you obtained during sanding.
Homemade DIY Methods of Cleaning Headlights

Sanding is efficient, but it takes a lot of time and effort. If you are at home and want a temporary quick fix, use the following expedient solutions to clear cloudy headlights:
- Toothpaste
Outside of cleaning your teeth, toothpaste can be used for 101 other things, like repairing your headlights. It has ingredients that break down oxidative contaminants on the lens surface and are somewhat abrasive.
Apply a thin layer of evenly distributed toothpaste and baking soda to the surface of the headlight. Before removing it with a soft, damp towel, let it dry. You would have clearer headlights than before, and you would be prepared to complete the remaining evening errands.
- Use Distilled Vinegar and Baking Soda
Like toothpaste, baking soda and vinegar are extremely versatile items. Baking soda breaks down impurities, while vinegar cleans automobile headlights of dirt with ease. Combine the same amount of baking soda and vinegar to create a frothy paste. Headlight paste should be applied, allowed to sit for a while, and then removed with a soft cloth. You’ll have brighter headlights in no time.
- Use Coca-Cola
Your preferred beverage can indeed aid in the restoration of your car’s headlights. It has phosphoric acid, which effectively dissolves rust and stains. Spray a proper amount of diet coke on your headlights after filling a spray bottle with it halfway (it’s easier to clean because there are no sugar residues). Before drying it with a microfiber towel, give it a minute to sit. If your headlights are severely corroded, you might need to repeat the procedure several times.
- Use Dish Soap
Before performing this method, clean the dust and other debris out of your headlights. Apply hot water and dish soap, then wait a short while for the hot water and dish soap to absorb. Wipe with circular, even movements, then rinse. For best results, repeat the steps.
Preventing Oxidization
Although hazy headlights can’t always be prevented, there are a few steps you may do to prevent them from oxidizing too quickly:
- The simplest way to prevent oxidation is to park your car in a shade whenever possible because UV radiation is the primary cause of headlight deterioration.
- Car headlights may get blurry due to dirt and chemical layer. By frequently washing your car with the right chemicals, you can prevent fogging.
- Regular use of a headlight restoration wipe: They don’t need to be completely yellowed before you can clean your headlight covers with a restoration wipe. Buy a headlight restoration kit, and apply it on your headlight covers once every few months to keep them as bright as they were when you first bought your car.
Restoring Headlights Permanently
On a relaxing Sunday afternoon, you can fix your headlights by using the procedures above. While some DIY solutions for restoring headlights are temporary, the best method for permanently recovering headlights is using a dedicated solution for headlight restoration. Using headlight restoration kits are as simple as using a home made remedy and are usually well-explained on the user manual.