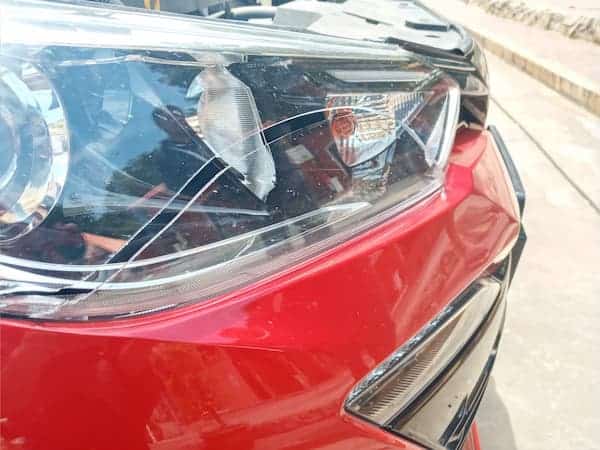
Headlight covers are crucial components of your vehicle, acting as the first line of defense against road debris and the elements. A broken cover can lead to moisture accumulation, dimmer lights, and can even affect your car’s aerodynamics. Fixing a broken headlight cover is a straightforward task that can restore the look and functionality of your vehicle’s lighting.
Table of Contents
ToggleAssess the Damage
Before diving into the repair process, it’s important to assess the extent of the damage. Minor cracks or chips can often be repaired at home. However, significant damage may require a replacement of the tail light covers.
Repair or Replace?
- Small Cracks or Chips: These can usually be fixed with a high-quality adhesive or sealant.
- Large Cracks or Missing Pieces: This typically calls for a full replacement.
For minor repairs, follow the steps below. If a replacement is necessary, skip ahead to the replacement section.
DIY Repair for Minor Cracks and Chips
Materials Needed:
- Automotive adhesive or epoxy
- Sandpaper (fine-grit)
- Clean cloth
- Masking tape
Instructions:
- Clean the Area: Use a clean cloth to wipe down the broken area, ensuring it’s free from dirt and debris.
- Sand the Edges: Gently sand the edges of the crack for better adhesive bonding.
- Apply Adhesive: Apply the automotive adhesive carefully along the crack.
- Secure with Tape: Use masking tape to hold the crack together while the adhesive dries.
- Polish: After drying, gently sand the area for a smooth finish.
Tips for a Successful Repair:
- Ensure the headlight cover is completely dry before applying adhesive.
- Use adhesives designed for automotive use to withstand the elements.
Professional Replacement for Major Damage
If the cover is beyond a simple fix, purchasing a new one is your best bet. Here’s a step-by-step guide:
Replacement Steps:
- Purchase the Right Cover: Make sure to buy a cover that matches your vehicle’s make and model.
- Remove the Old Cover: This may involve unscrewing bolts or clips.
- Install the New Cover: Align it carefully and secure it in place.
- Seal the Edges: For additional protection, seal the edges with a weatherproof sealant.
For a detailed guide on the replacement process, consider the article on how to brighten headlight covers.
When to Consult a Professional
| Issue | DIY Potential | Professional Help Needed |
| Small Crack or Chip | High | Low |
| Large Crack or Missing Pieces | Low | High |
| Complex Headlight Assembly | Low | High |
Maintaining Your Headlight Covers
Maintaining your headlight covers can prevent future breaks or cracks. Regularly cleaning them and applying a protective sealant can go a long way. For tips on preventing dust accumulation and moisture ingress, refer to why you need a headlight dust cover.
Conclusion
Fixing a broken headlight cover is about assessing the damage, determining the best approach, and either repairing or replacing the cover. Always prioritize safety and functionality over aesthetics. If you’re uncertain about any step, seeking professional help is advisable.
Remember to check out our guide on how to remove headlight tint for related information on headlight maintenance. Stay safe on the road by ensuring your vehicle’s lights are in top condition.